How to Capture Images Within Prospect

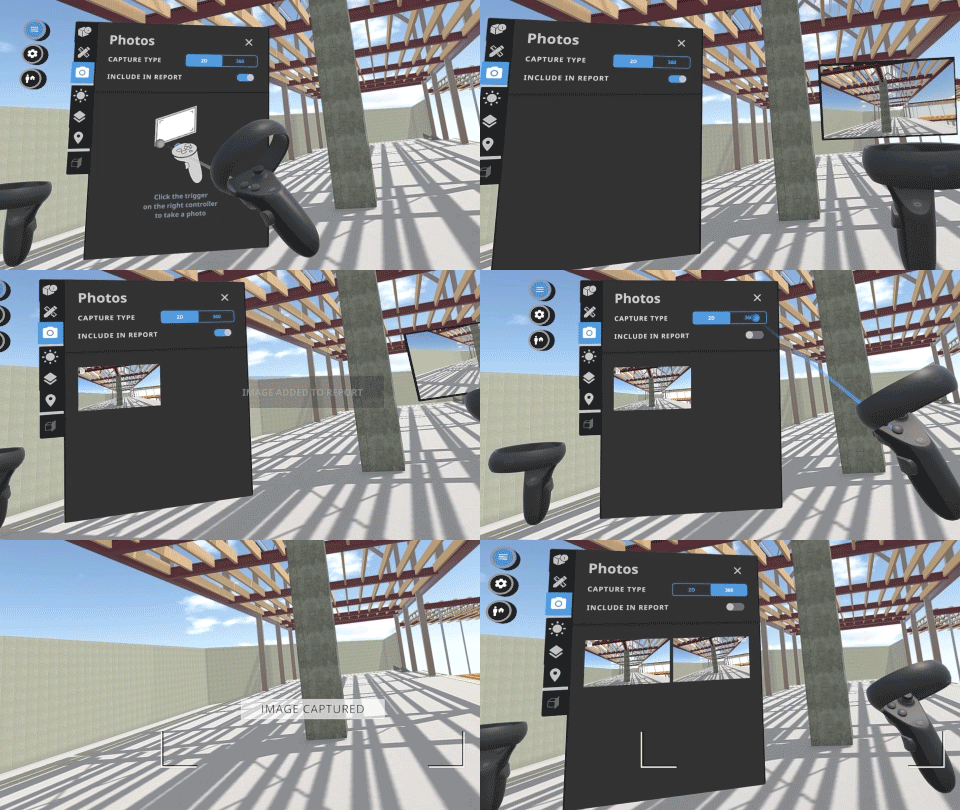
Photos feature allows you to capture moments of your VR walkthrough in real-time. Activate the camera by pointing and clicking at the icon in the menu. Then use your controller to point and shoot at the view you’d like to save.
Panorama capture allows you to easily capture a 360 panorama from within Prospect. To activate, click on the camera icon in the toolbar then toggle the "360 Capture On" setting and use the right trigger to capture the panorama. Once the image has saved, you'll see an "Image Captured" confirmation appear on the screen. You can now access the saved Panorama on your desktop, and upload it to your Scope Library using this guide.
Pointing at your capture thumbnails in the VR menu allows you to identify which are panorama captures, and which are regular screen captures. When hovering over a panorama, you'll see a "360" overlay.
Whether you create a 2D or 360 capture you can set where the images will save to within your project library, as shown above.
Note: panorama capture is not currently supported on the Oculus Quest.
Accessing Your Images in Prospect Library

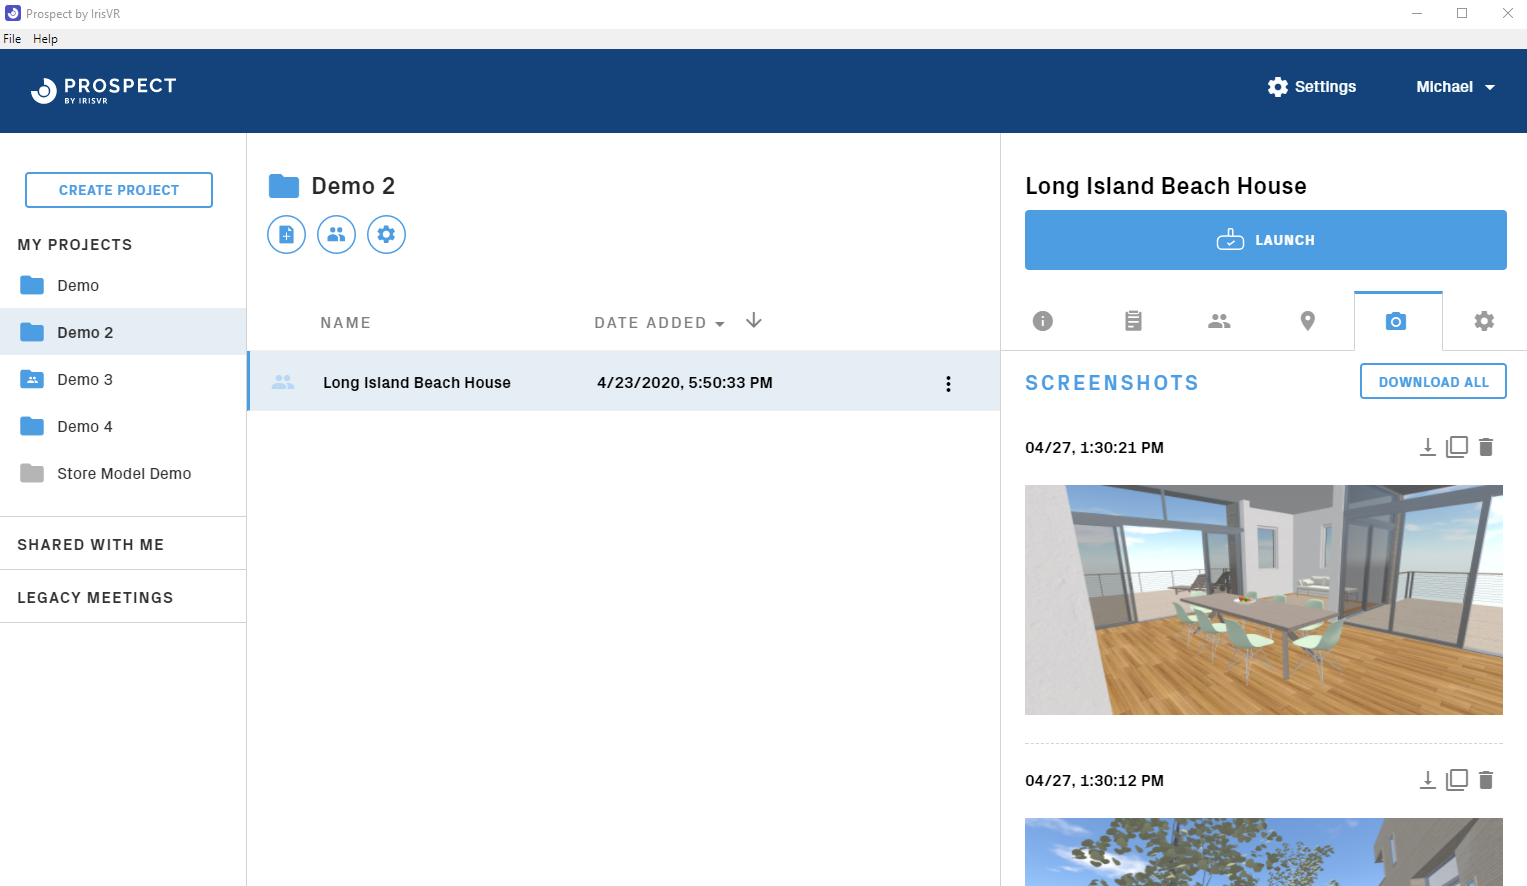
Photos will show on the right-hand side of you Prospect Library, under the camera icon
Downloading and saving images is possible on both a "Download All" and per screenshot basis and you can set where images will save within your File Explorer. Additionally, you can copy and delete images from the photos menu as well.
Any annotations, callouts, or changes you've made while in your Prospect experience will appear in your panorama - even your Meetings avatar! Go on, take that VR selfie.
Please Note: With all files on the Oculus Quest, as well in Meetings, photos must successfully complete a sync before they will be available in your desktop library.
360 Panoramas from Desktop to Mobile Phone
The video below shows the workflow from capturing a 360 panorama and viewing them in Scope app.