NOTE: With version 2.12 of Prospect, Issue Tracking formally replaces the feature set formerly known as Reports. Issues rely on a synced projects with a stable internet connection, and cannot be accessed in offline or local projects.
In-VR, Issue Tracking Modals
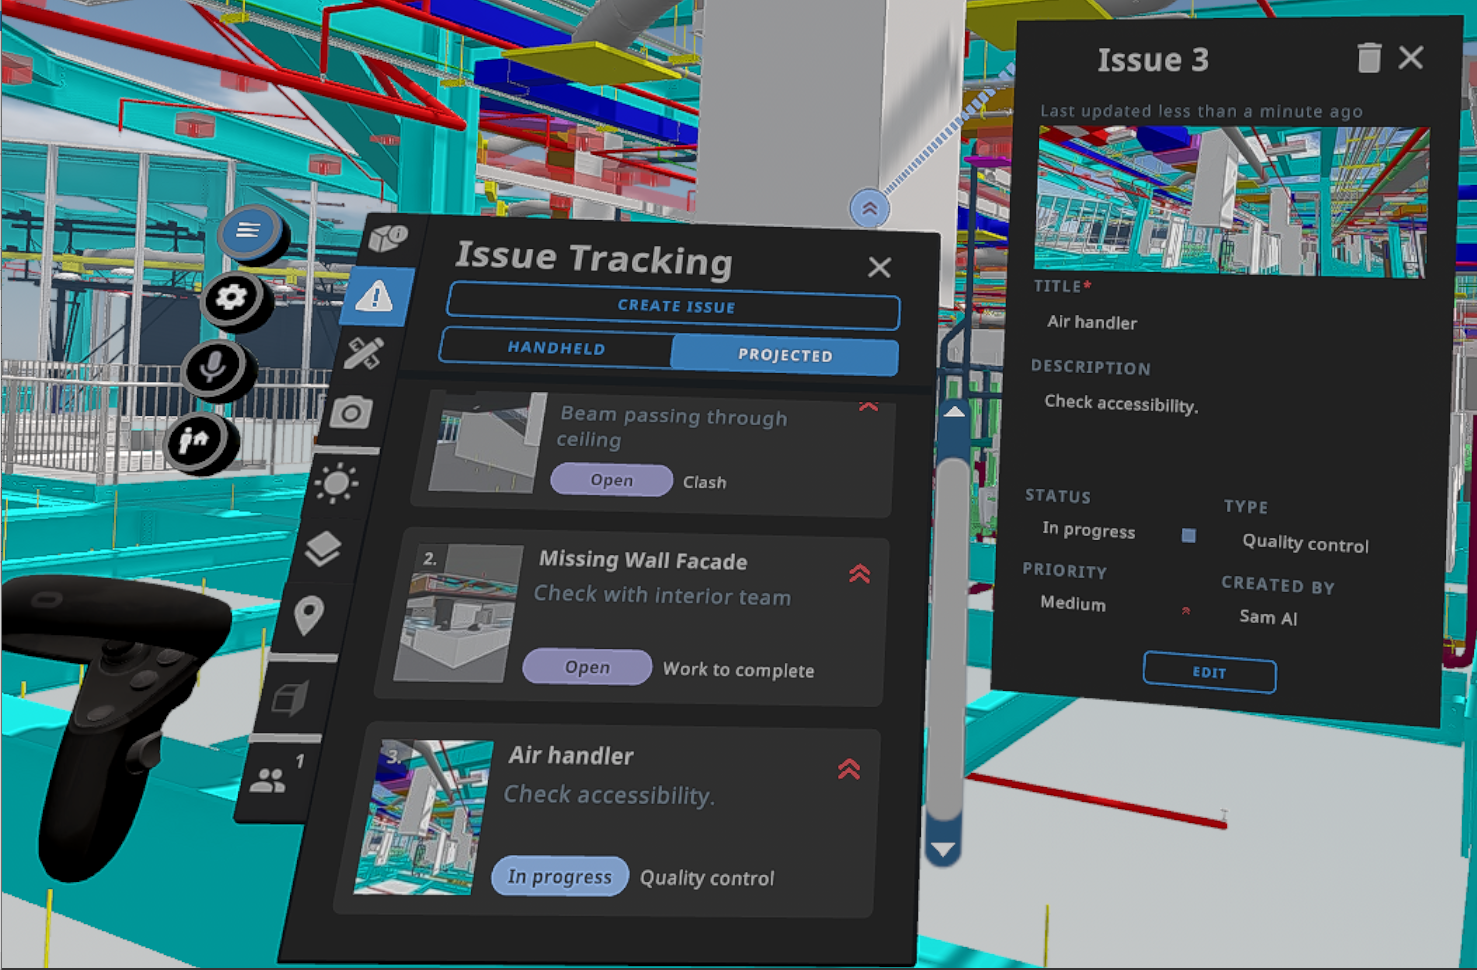
Issue tracking allows for robust documentation of clashes, issues, and other necessary revisions/points of interest in a model. Issues capture the location, and a snapshot of the area pinpointed, along with some user-input data such as a title, priority, and type.
These issues can be navigated to (think viewpoint functionality) and can be seamlessly updated as a project progresses.
To create an issue:
- Launch the synced file
- Open the Issue Tracking tab
- Click the “Create issue” button
- Use the trigger on the controller (or the right button on a mouse w/Prospect for Desktop) to select the geometry your issue is associated with.
- Populate Issue fields
- Title is required for all issues, issues will not save without a title.
- Additional fields are recommended but optional.
- Voice-to-Text can be used in addition to the keyboard.
- Save Issue
Once saved, issues can be edited, updated, and deleted both in-VR as well as from the desktop library. Click on the edit button within any issue, and save when edits are completed. The trash can icon can be used to delete issues.
Issue Fields
- Priority
Issues can be assigned 5 Levels of priority, ranging from Trivial to Critical. - Status
Use this field to indicate the current status of the issue. Issues can be given a range of statuses including Open, On Hold, and Resolved. - Type
Issues can currently be assigned types, including categories like Clash, Issue, and Quality Control.
Filtering Issues
Filter issues across multiple attributes to tailor the list of issues you'd like to see whether you're in-VR, in the Prospect Library, or preparing a CSV or PDF export.
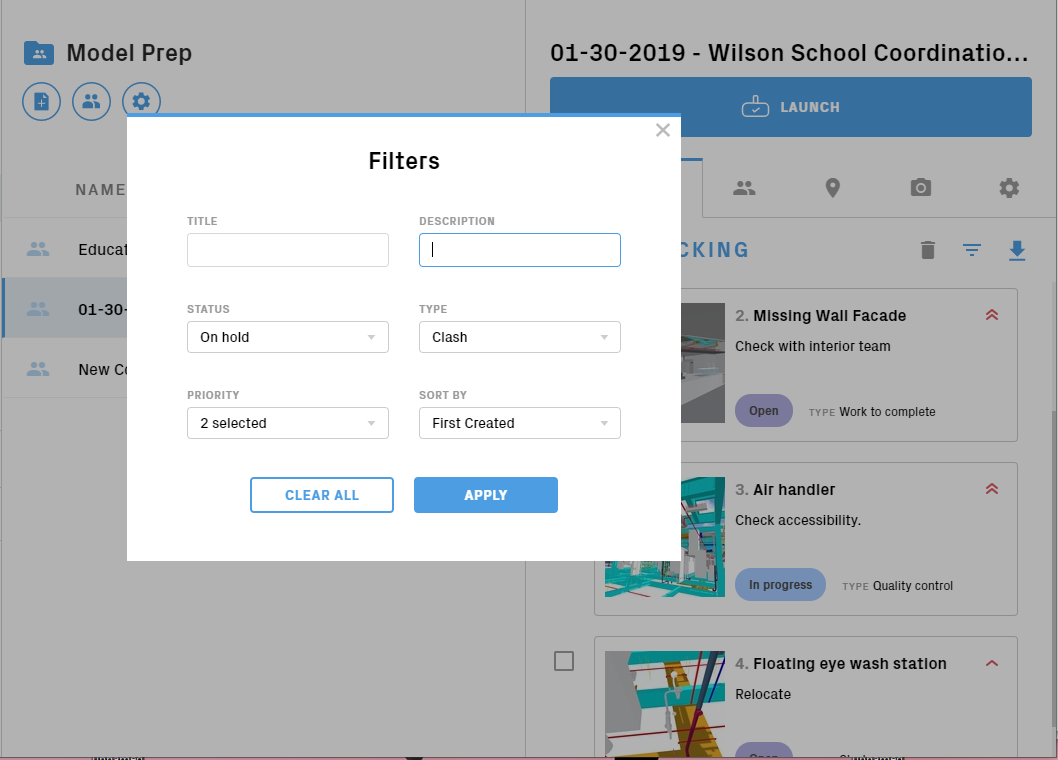
Issue filtering - Prospect Library
Exporting Report
In the Prospect Library, within the Issue Tracking tab, you will find an arrow pointing downward. Clicking this arrow will present three download options - .CSV, .PDF, or .BCF*. Select your preferred output type to export the current list of issues and their corresponding text and image fields. Please note that BCF files can take a significant amount of time to export, and will open in the destination folder when completed.
BCF exports have been tested and verified with the following Revizto5, BIM Track, BIMcollab Zoom, Trimble Connect, and Vectorworks
Notes:
- Issue Tracking requires an active internet connection and for the file to be synced
- Issue Tracking replaced the previous Reports functionality. Report entries created in past versions will still be downloadable as PDF from the link at the top of the Issue Tracking tab of the right-hand file panel in the Desktop Library
- In particular,.BCF exports require some time to export- and export times do increase as the total number of issues increases.
- Let us know if you’re using any other BCF enabled workflows not listed here - any feedback is welcomed and appreciated.
- Learn more about the BIM Collaboration Format here.
- *BCF export available for users on v2.13 or newer