Prospect is optimized for projects at Revit scale, from small buildings to large sites. Projects that stretch across tens of miles will likely not perform well in VR. And while performance is also affected by your hardware, less geometry is always better.
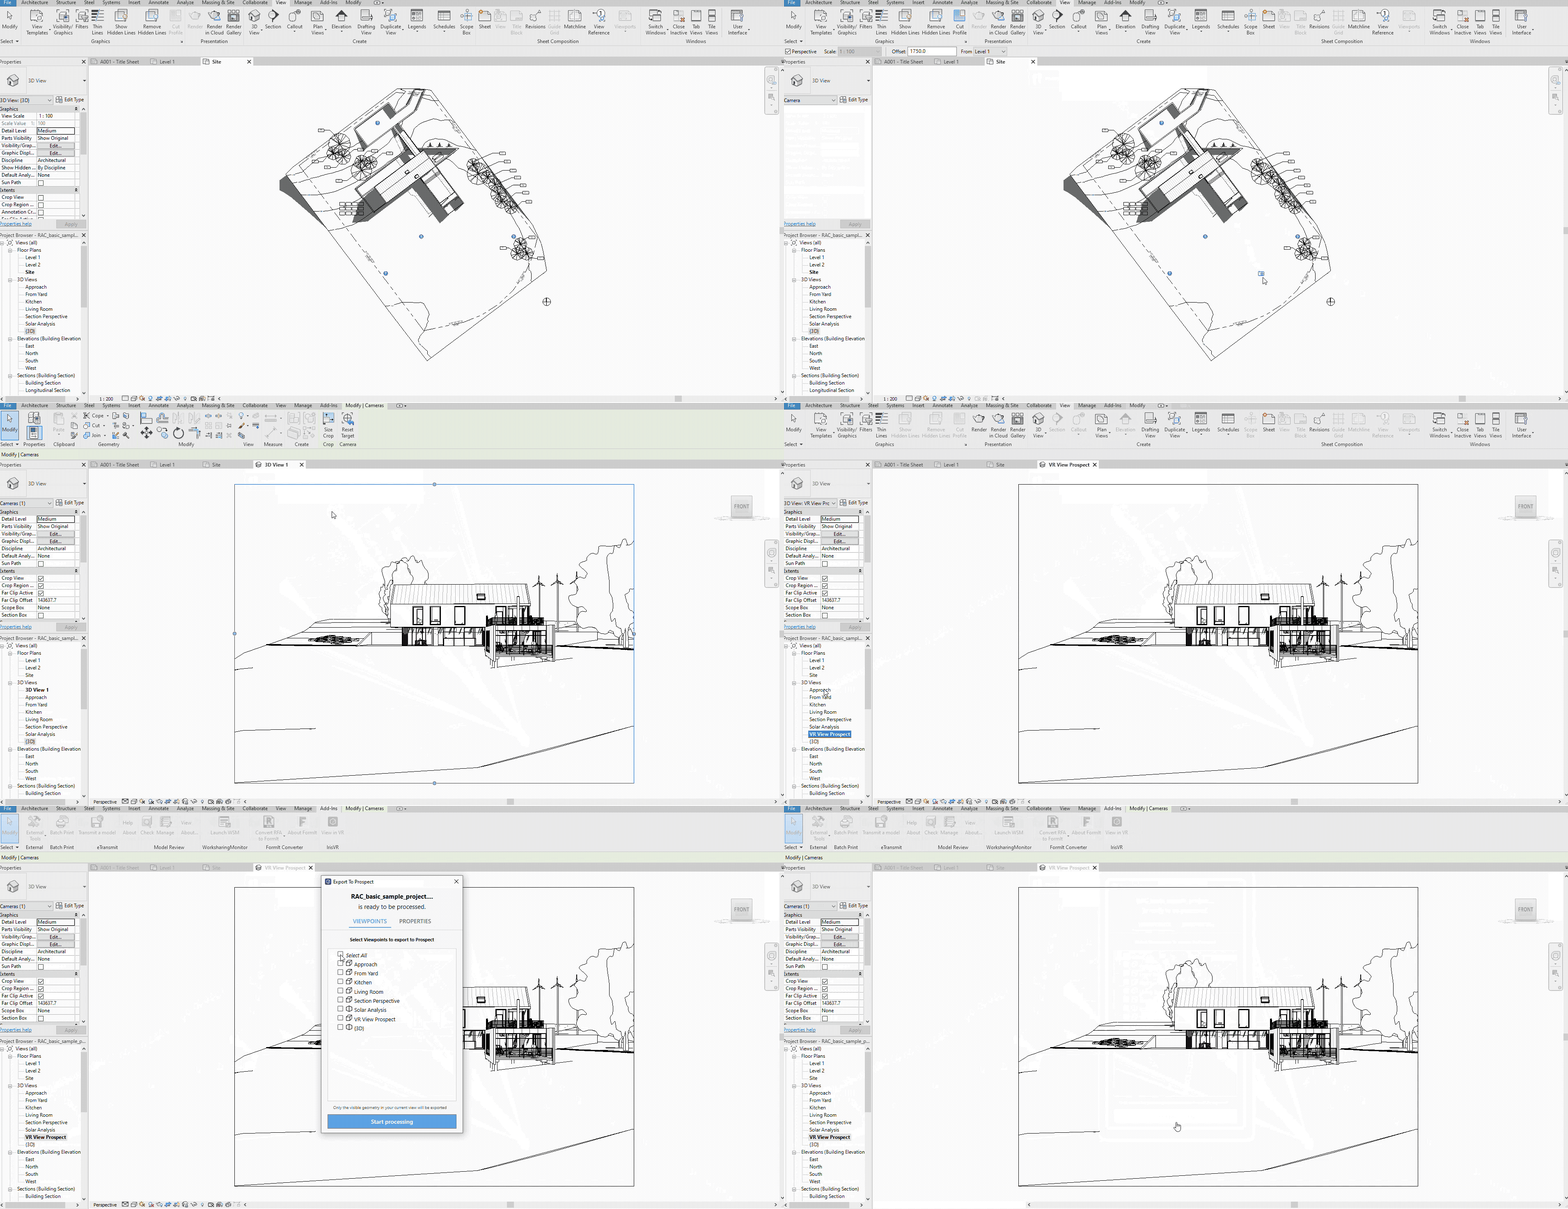
To start, create or select the 3D view you'll be using for VR
Do this by:
- Open your model in Revit
- Click View > Create > 3D View > Camera
- Click once in the drawing area to place the camera and again to place the target point
- Rename your 3D view something specific, so you know it's intended for exporting to Prospect
- When you click "View in VR", select the 3D view you created
Why this helps: Prospect only exports the geometry present in the selected 3D View at the time of export. This view will reflect and retain changes made to your file, saving you from repeating these steps.

Image: Camera View Creation Revit
Next, reduce categories
Everything you have modeled or linked within your file may not be needed in VR; decide what is important to see and hide the rest.
Do this by:
- Go to View > Visibility & Graphics OR use the VG keyboard shortcut to activate this menu
- Under Model Categories, turn off visibility for categories by deselecting them, some examples:
- heavily repeated elements such as rebar, nuts, bolts, etc
- elements modeled in great detail, often vendor provided 3D assets can be guilty of having dense geometry
- nice-to-have features, such as be trees or furniture (also often repeated heavily)
- trade specific categories
Why this helps: Reducing extra geometry is the fastest and easiest way to improve the VR experience without compromising information shared.

Image: Visibility & Graphics Override Menu for Model Categories - uncheck boxes next to any that can be eliminated
Then, hide linked files and worksets
Do this by:
- Go to View > Visibility & Graphics OR use the VG keyboard shortcut to activate this menu
- Under Revit Links tab, click check boxes to turn off
- Under Worksets, click the drop down to Hide
Why this helps: Linked reference files can significantly add to your file size and slow down performance in VR. Removing them when possible helps maintain a smaller size and quicker performance. Think about the intent and collaborators present in a VR walk through, and consider only bringing in what is necessary.

Image:Visibility & Graphics Override Menu for Revit Links

Image:Visibility & Graphics Override Menu for Worksets
Now, define the geometric bounds
By default the bounds of your model are it's full extends, you're able to edit this to be just the area you are reviewing within your selected 3D View.
Do this by:
- Double click to select the 3D view you created for specifically Prospect
- Check the checkbox next to "Section Box' within the Properties tab to activate the interface to control the section
- Push & pull bounding box to constrain geometry to the desired area
- Click View in VR to bring this view into Prospect
Why this helps: The section box will increase in-VR performance and load your file from the Prospect library faster.

Image: BEFORE adjusting the Section Box

Image: AFTER adjusting the Section Box
Last, leverage Prospect's settings
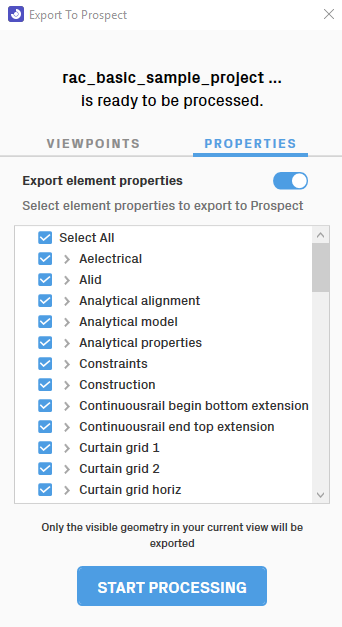
Revit files can contain a lot of metadata, to manage this, Prospect has a feature to help you customize what is brought into VR.
Do this by:
- Click "View in VR"
- If you wish to customize the configuration, allow properties to load.
- For 300MB+ files this could take a bit of to populate, but will be beneficial to your framerate and general VR experience
- If you won't be inspecting metadata, use the toggle to turn off property collection
- Once the Properties tab is populated, browse and deselect fields that are not necessary
- Click start processing to bring into VR
Why this helps: Reducing the overall data being imported into Prospect will enable you to import and view only fields that are useful for your design review.

Image: Select relevant properties before exporting into Prospect
Still running into issues?
For Oculus Quest Users: Standalone headsets can not handle the same size file as a desktop PC can. Follow the optimization steps above, but during the section box step start with the smallest possible area. Do a test launch to confirm it opens in Prospect and then gradually increase size.
For everyone: Hiding, selecting and adjusting geometry is always the easiest way to work with existing files, but when creating new files review your geometry to identify if it could be modeled in a cleaner or simpler way.
If you've performed all the steps above and are still running into performance issues, send us a message and we can help you further by looking at your specific file.