V-Ray 3.4 for SketchUp
- Use a regular camera in the location that you’d like the panorama to be centered.
- Open the V-Ray “Asset Editor”
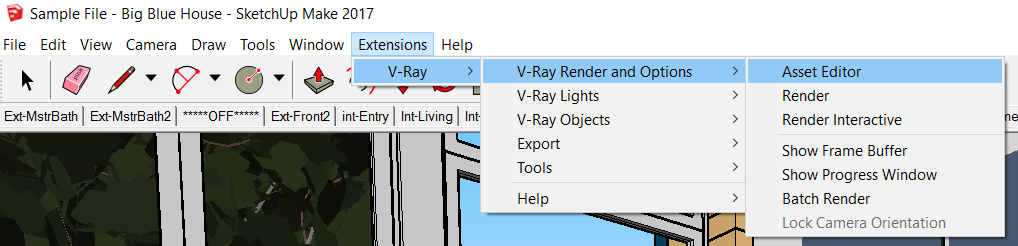
- Expand the “Camera” settings menu.
- Select “VR Cubemap” as the type.
- Toggle the “Stereo” selector to the on position
- Toggle the “Save Image” setting to the on position and select a directory for the file to be saved after the render has been completed.
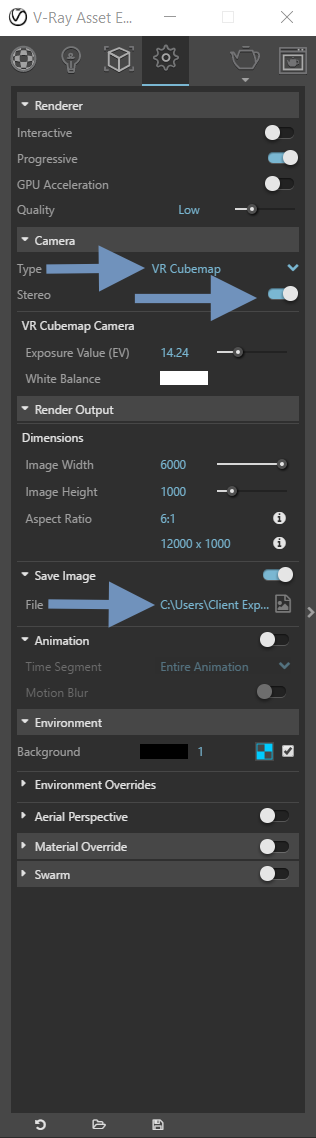
- To set the resolution, expand the “Render Output” menu:
- V-Ray will maintain the aspect ratio for your Cubemap, so the only adjustments you’ll need to make here are the image width and height.
- You can adjust the quality of the render using the “Quality” selector in the “Renderer” menu. Keep in mind that higher quality renders will take longer to create, especially on less powerful systems.
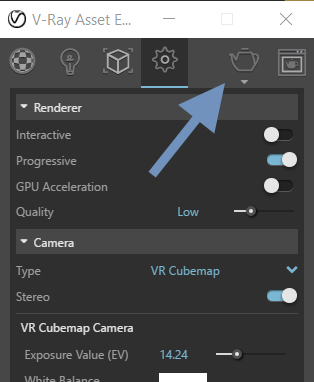
- Once everything is set up, click the teapot icon on the top right of the Asset Editor toolbox to render your panorama.
- You can use the V-Ray frame buffer window to monitor the status of your render, and watch as detail is added through the process. This may open automatically, or you can toggle it by clicking on the corresponding icon to the right of the render (teapot) icon.
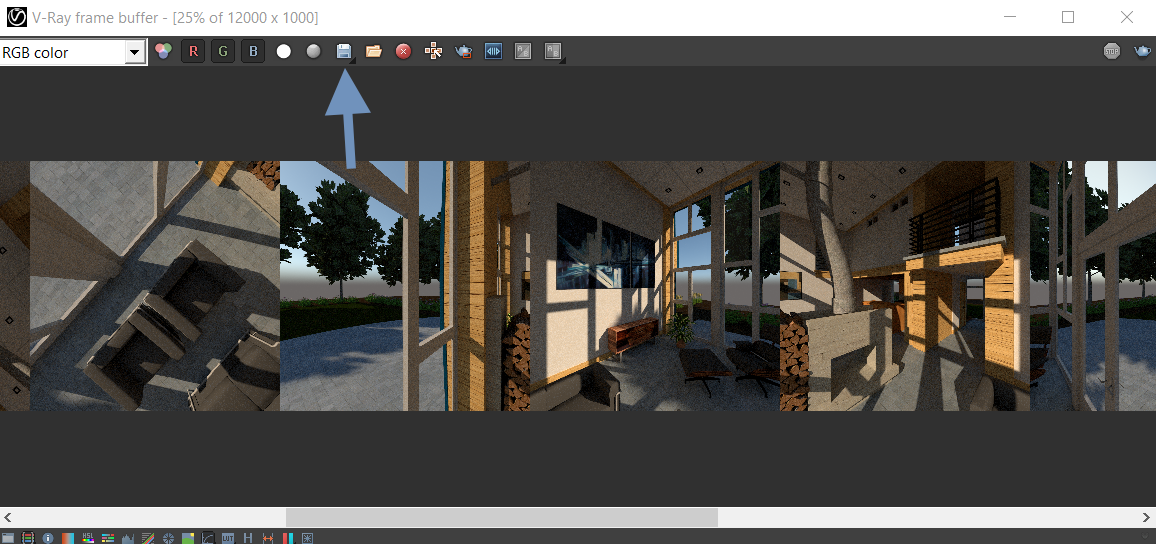
- If you’d like to save a version of the render before the entire process has completed, you can do so by clicking on the save icon on the top of the frame buffer window (floppy disk icon).
- Once the render has been completed, you’ll end up with a composite of 12 squares, all side by side.
- You may end up with two output files, one whose name is appended with “.Real_color”. You’ll want to make sure you’re uploading the alternate file to your Scope library.
- Upload the image to irisvr.com/panos. Full tutorial here.